{ Inspiration }          { Fashion }          { Green[er] }          { DIY }          { Tips }          { Our Wedding }
Showing posts with label DIY. Show all posts

Thursday, March 24, 2011

Tips: Handmade Thank You Cards

All of our thank you cards have been mailed - for our wedding, for my shower, and now for my birthday. For each thank you, I used a different card. The thank you notes for the wedding matched our invitations. I purchased stationery from the Walgreen's across from my office for my shower notes. And for my birthday, well, I tried my hand at custom making cards.

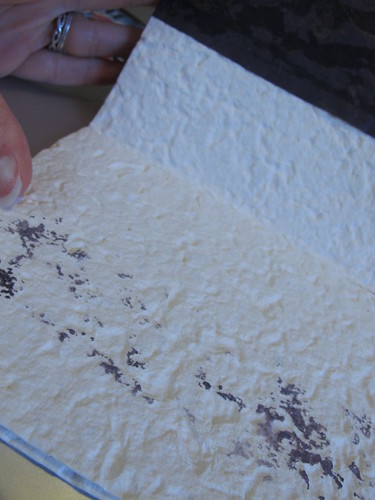
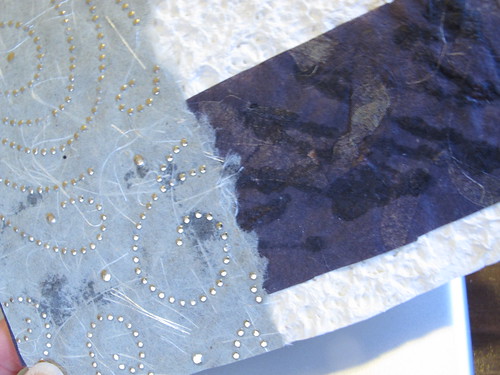
When making these cards, I learned a couple of things about handmade, treeless papers. Some are pretty thin, which means adhesives can soak through.

Glue was too wet for paper and stained it
Color bleed where glue was applied

Others are pretty porous and take a lot of glue before you can affix it to something else.

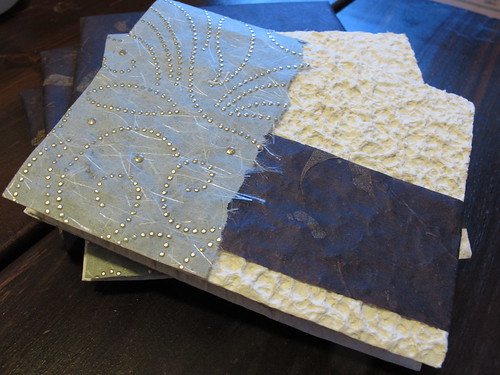
Handmade Note Cards

As you can see from the photo, the moonrock paper (off-white cardstock) has a lot of texture. This texture made affixing the other papers a little challenging as the paper wasn't always in contact with the glue.

One thing this experience taught me is I should have taken swatches and tried various adhesives rather than working on the final cards. Luckily I had extra materials and could redo the ones I ruined.

Making your own invitations? Try this to reduce your frustration:
  1. Purchase extra supplies to cover any mistakes.
  2. Purchase supplies for a mock up.
  3. Create swatches of your selected papers and try different adhesives. Note how quickly the glue dries, whether it causes ink to run, etc.
  4. Revise your design.
  5. Create your cards. 
Did you make your own invitations? What did you learn along the way? 

Saturday, March 19, 2011

{Green} My Favorite Things #7: Fabric Flowers

Project Wedding's DIY Wedding Challenge 2010 Paper Flower Bouquets

Last weekend I shared tutorials for paper flowers. Picking up where I left off, here's a round up of fabric flower tutorials. Before I share the rest of the fabric flower tutorials, indulge me while I share some yarn flowers. (The bouquets above are a mix of paper and yarn flowers.)

Credits: Yarn Flowers designed by Lauren De Bellis, photographed by Kate Mathis for Country Living, spotted on Poppytalk.

These yarn flowers are a flash from the past. My mom, my sister, and I used to sit around the dining room table on rainy days making these to top packages. Kid Craft Central has a tutorial that matches how my mom taught us. One thing my mom did to keep the blooms fully plumped was to add a little spray starch to stiffen the finished flower.

When we were planning our wedding I fell in love with chiffon, tulle, and organdie flowers. There was something so romantic about how soft and ethereal they appeared.

Credits (left to right): Chiffon Peonies by Ruffles and Stuff; Chiffon and Tulle Flowers photographed by Olivia Kanaley, spotted on Project Wedding; Organza Flower Headband by Elizabeth Anne Designs from a tutorial by Reese Dixon.

There's also something timeless about organdie as evidenced by this tutorial from 1922.
Organdie flower tutorial shared on Wearing History. For information about the type of stitches used,  Lauren recommends reading Lesson X-A Good Start Deserves a Good Finish from Paris Frocks at Home (1930) at Vintage Sewing.info.

Want something a little more substantial? What about turning t-shirts into flowers? These two tutorials will show you how: Linda of Craftaholics Anonymous makes pom pons and Maize Hutton creates a bouquet for The Bride's Cafe.

Credits: Top Row (left to right) - Jersey Pom Pons by Craftaholics Anonymous, spotted on Something Old, Something New; Flower Roses photographed by Mark Brooke, spotted on Green Wedding ShoesBottom Row (left to right) - Handkerchief Rosettes by Ruffles and Stuff; Handkerchief Roses from Eco-Proper, spotted on My DIY Wedding Day.

Some brides have handkerchiefs from their mothers or grandmothers that they use for their Something Old, typically wrapping it around their bouquet. Another thing you can do with handkerchiefs is create flowers. You could even wear the handkerchief flowers in your hair or go flowerless for your groom's boutonnière.

Saturday, March 12, 2011

{Green} My Favorite Things #6: Paper Flowers

First let me apologize for the sporadic posting this week. I've had lots to sidetrack me - honeymoon planning, class, and Marketo's Rock Your Revenue Roadshow. I promise next week will more than make up for it.
  • Monday, we'll continue with recaps. Not one, but two! I have a deadline now - our book must be done and in our hands before we leave on our honeymoon.
  • Wednesday, the Pampering the Groom series covers selecting a custom shirt for your groom and the men in the wedding party.
  • Thursday, I'll be featuring {Heritage & Craft} Vintage and Custom Rentals. If your wedding dreams involve furniture, sweet details, or props, you aren't going to want to miss this post. I interviewed Erin yesterday; she's amazingly creative and energetic.
Of course there will be eye candy - shoes on Tuesday, purses on Thursday, and movie-inspired fashions on Friday.

It's sunny outside and Spring is on my mind. Therefore, I've got a round up of paper flower tutorials for you (if you like fabric flowers, check back next Saturday).
Credits: Top Row (left to right) - Paper Flowers photographed by For You Love Me, spotted on Ruffled (tutorial for these world's easiest paper flowers from Miss Trail Mix (Weddingbee)); Paper Boutonniere, photographed by Pat Furey, spotted on Project Wedding (tutorial for paper leaves on Just Something I Made). Center Photos - Paper Flowers handmade by Wire & Paper (template for making the flowers and tutorial on 'i do' it yourself), photographed by KIM+PHIL Photography, spotted on Weddings FreshBottom Row (left to right) - Crepe Poppies Daisies and Pearls spotted on The Sweetest Occasion; Origami flowers crafted/photographed by Miss Guinea Pig (Weddingbee) from a tutorial by Folding Trees.
I couldn't find a tutorial that I liked for creating boutonnieres from vintage paper (top right image in the scrapbook above). So, I'm going to cheat and include a fabric flower tutorial.
Credit: Jessica Jones of How About Orange

Jess of How About Orange shows us how to turn fabric scraps into formed flowers with a little bit of Stiffen Stuff, a button, and thread. By changing up fabrics and sizes of flowers you can change a bare wall into a gorgeous waterfall of Spring color. For your paper flowers, substitute Mod Podge for Stiffen Stuff and paper for the fabric scraps.

Other tutorials for paper flowers
  • Raid your kitchen cabinets for cute cupcake wrappers (or substitute ruffled coffee filters) to create interesting flowers in no time at all.
  • Add 3D pinwheel flowers to the walls of your hall. Vary sizes for greatest interest.
  • Double the materials Nice Package requires and you've got colorful paper pom pom spheres that you can hang in doorways, from staircases, or top tables with.
P.S. If it's gorgeous weather where you are today, please don't start crafting now. Go enjoy the day!

Thursday, January 13, 2011

DIY: Custom Jewels for Your Girls

When I got engaged I wasn't much of a jewelry person. I tended to wear jewelry that had a sentimental connection. And I certainly had no idea how to buy it. Well that changed when I started planning a wedding and all of our maids asked what necklaces and earrings they should wear. My initial answer? I don't know.

Luckily there's GemKitty. First let me disclose that my sister-in-law Arwa is the Kitty in Chief in there. But even if she wasn't, I'd still say it's a lifesaver for brides who aren't knowledgeable about jewelry and want a quality product.

GemKitty is a Portland, OR-based, online custom jewelry shop. With a few clicks of your mouse you can have necklaces and jewelry that match or complement your wedding colors.

You remember those gorgeous necklaces that my DOH and our maids wore?
Photography Credit: Jessica Palopoli
They were a variation on GemKitty's Limited Edition Twist Necklace. (I liked this design so much that I got one of the necklaces to wear with my going away outfit.)
Photography Credit: Jessica Palopoli
To ensure a perfect fit, Arwa had me send her each maid's measurements. Why is this important? So that the necklaces were the right length for each maid.

After our wedding I went back to GemKitty to get earrings. (With Syzygryd and Burning Man so close to our wedding life got hectic and I postponed this task.) I decided to customize the Emma earrings.

I selected the top gemstone - Onyx to match our necklaces. Next I chose the bottom gemstone - Rose Quartz for two and Amethyst for the other two. And then I chose the precious metal - Silver to match the necklaces. As easy as 1-2-3!

Once you design your jewelry, you get a note from GemKitty that shows your design and tells you what the stones you picked mean. Here are the notes for the earrings I designed.

You can also share your design by email, via Twitter or Facebook. This is great if you want your maids or mom to give you feedback. As soon as you buy your jewelry, the kitties at GemKitty start working. I'd ordered the earrings for holiday presents and they arrived in time for me to deliver them to the girls. I didn't pull any strings - GemKitty had expedited shipping and an order by date to ensure holiday delivery.

I haven't yet gotten to see (and photograph) my maids in their GemKitty earrings so I'll share photos of another bride's maids. Mariana also chose to customize Emma earrings.
Photography Credit: Eric Leung Photography
Photography Credit: Eric Leung Photography

Thursday, January 6, 2011

DIY: Sourcing the "Perfect" Paper

It seems that it's never too early to start looking for that perfect "paper" for your wedding. Searches can be complicated by wanting specific colors or materials.

Where are you finding papers for your wedding? Locally or online?

With our wedding I researched handmade and eco-friendly papers. If you're doing your paper goods (save the dates, invitations, programs, table numbers, and so on) yourself, the earlier you start the better your options and lower the total cost. You need to consider the following in lead time:

Contacting Vendors +
Ordering Samples + Shipment of Samples +
Ordering of Chosen Paper + Shipment of Paper +
Production

We obtained sample books and/or sample sheets from the following vendors:
We ordered accent papers from Creative Papers Online - variety of texture and wide array of colors - and printer-friendly insert sheets and cover stock from EcoPaper.com. (While we loved the papers from Under the Sun the papers and colors we wanted were out of stock. I wanted a consistent paper for all of our paper goods so we didn't buy from them for our wedding.)

I forget how I discovered Paper Mojo but by the time I did it was too close to our wedding to order samples (individual 8.5"x11" sheets or 3"x5" sets). Also we would have missed out on a sale. They had eco-friendly paper (27"x38") in our wedding colors for $1.50 to $2.25 a sheet (normally $3.59 and up). I'd recommend taking advantage of their custom cutting service (we didn't and ended up scrambling to get the paper cut ourselves). Inspired by the DIY Votive Vellum Wrapper I saw on Ruffled, I used a sheet of our striped purple paper to wrap mason jars that lined the aisle for Mooflyfoof and EdRabbit's wedding.
DSC_0308
Photography Credit: Andy Rose NY via Flickr
For Blanchisserie Americain (our box truck at the Lost Horizon Night Market) we had a compressed time frame between concept and execution. I quickly realized that in a pinch the paper options one finds at Jo-Ann Fabrics are dismal (nothing is eco-friendly) and pricey (8.5"x11" sheets were about $1). The holiday season may have contributed to the lack of selection.

Over the holidays, Under the Sun offered customers $10 off orders of $20 or more. Yesterday my paper arrived (8 business days between the Sunday I ordered on and delivery). 

I love how the colors and textures go together. Curious as to what I'm planning? Stay tuned.

By the way, Paper Mojo has some phenomenal papers on clearance right now. My favorite that I scored during the last sale is Dew Drop Melody on Banana Paper. I got it in parchment and smoke.

Tuesday, November 23, 2010

DIY: The Elusive Charm

There's no recap today. Last night I got sidetracked looking through more photographs of our wedding. Photographs of our wedding leave me speechless. This post and my reply to our friend took awhile to compose.

There are a few things evident in all of the photos taken that day:

  • There was joy.
  • There was love.
  • We were in the moment.

Capturing joy and love in photographs is not as easy as you think. Documenting through images, observing while not altering events, is extremely difficult. A photographer brings with them numerous tools: art, technical skills, story telling, observation, and psychology.

This year, like last year, we get the last week of December off. I have two tasks lined up: wedding favors and gifts for our parents. The challenge for both projects is to capture the joy, the love, and the moment from shared meals and from our wedding day. That's a tall order. I'm not expecting flawless grammar and perfect spelling. While that's a goal with any physical project, it's hard when you've poured out words and then stared at them for hours in an attempt to tame the flow and navigate the currents. Harder yet is editing. Choosing words and images with impact. Too much and whole will not be greater than the sum of the parts.

Today's Etsy Tuesday post actually appears on our food blog and has more 1950s cookbooks that are influencing the design. Along with finalizing the design of our cookbooklets (and our wedding books), we'll be choosing prep photographs for recipes, editing steps, and adding tips.

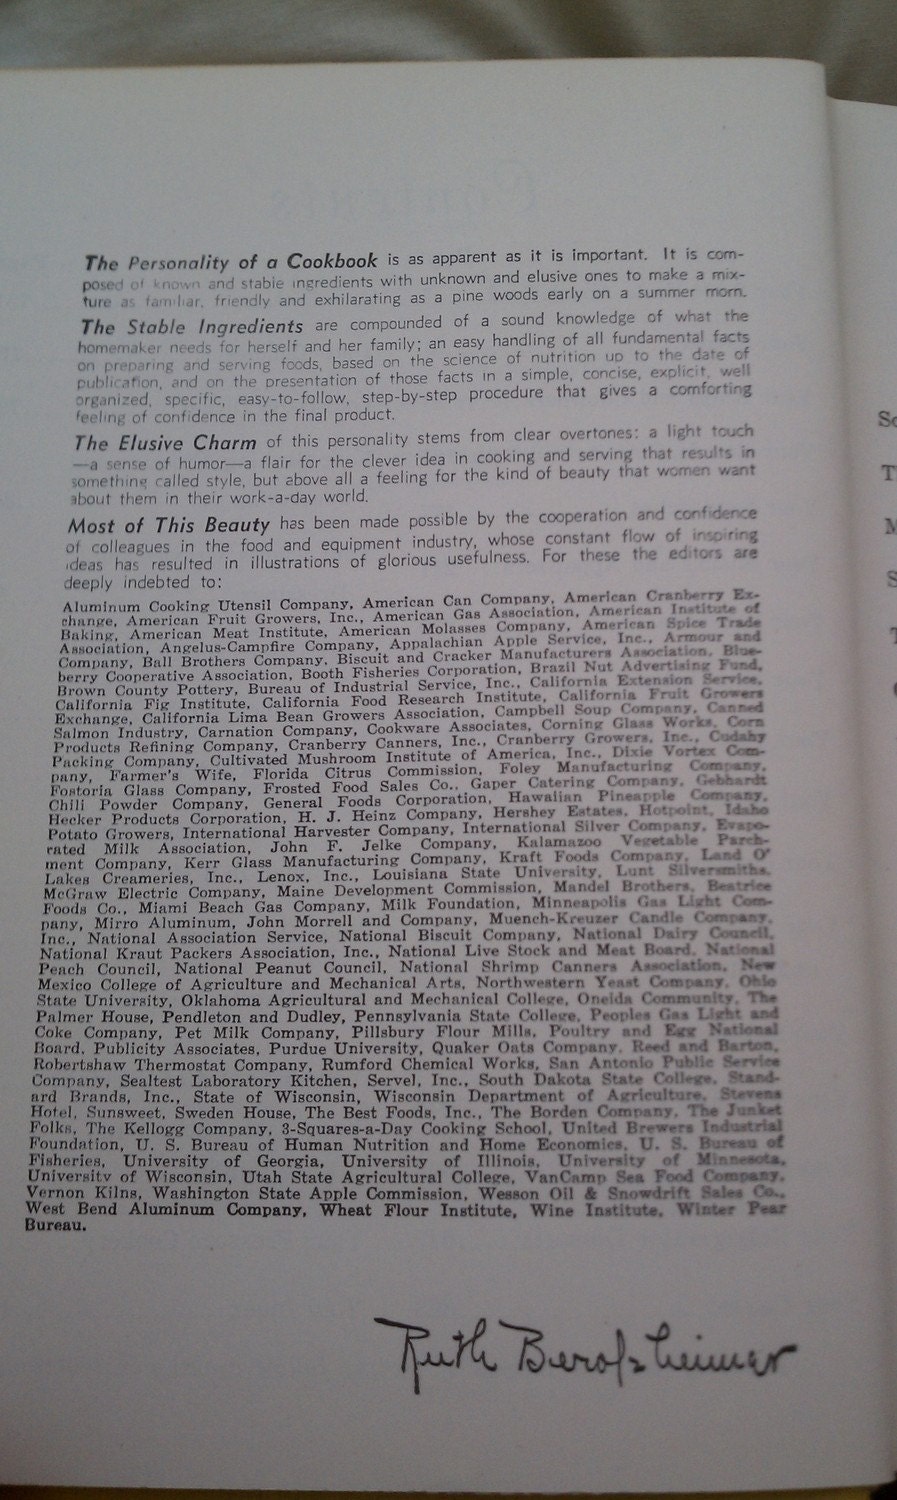
A forward from a 1950 cookbook captured what I hope to convey in both of my December projects.
1950 Culinary Art Institute Encyclopedic Cookbook
Image courtesy of MrsOtter06 (Etsy)

Ruth Berolzheimer writes:
The Personality of a Cookbook is as apparent as it is important. It is composed of known and stable ingredients with unknown and elusive ones to make a mixture as familiar, friendly and exhilarating as a pine woods early on a summer morn.
The Stable Ingredients are compounded of a sound knowledge of what the homemaker needs for herself and her family; an easy handling of all fundamental facts on preparing and serving foods ... and on the presentation of those facts in a simple, concise, explicit, well organized, specific, easy-to-follow, step-by-step procedure that gives a comforting feeling of confidence in the final product.
The Elusive Charm of this personality stems from clear overtones: a light touch -- a sense of humor -- a flair for the clever idea in cooking and serving that results in something called style, but above all a feeling for the kind of beauty that women want about them in their work-a-day world. 

Friday, November 19, 2010

Guest Post: Our Table "Numbers"

Mooflyfoof here again. Last time I talked about our flowers. This time I'll be sharing a DIY project we did: our table numbers. Like most brides, I was the lead on our wedding planning. I made many of the decisions and arrangements: logistical, aesthetic, and otherwise. I always checked with my fiancé Ed before committing to anything, though. One day about a month or so before the wedding I mentioned to him that many weddings in blogland do this thing where each table is represented by a thing rather than a number, and those "things" all fit in some sort of theme. For example, Eden and cubes' restaurant-themed table "numbers". I personally didn't care either way, and since Ed is a no-fuss kind of guy, I had assumed he wouldn't have any interest in a detail like this. Much to my surprise, he immediately took to the idea and began brainstorming ideas of different themes and how we could make them work. I was delighted that there was finally a wedding project in which he could be involved.

Table designations for our wedding


We both agreed that the theme needed to be San Francisco-related. This city is our home and we share a deep and unabiding love for it. Ed has often commented that he never truly felt at home until he moved here four years ago. The first idea we had was to use famous San Francisco streets: Divisadero, Mission, Van Ness, Lombard, Market, Geary, etc. The next idea was to have each table be a neighborhood: The Mission, SOMA, North Beach, North Panhandle, and so on. We eventually decided against those ideas because they were too difficult to summarize in a single photo. We finally settled on "quirky and lesser-known San Francisco landmarks". We liked the idea of showing our friends who live here something new and interesting that they might not have already known. We also wanted to share with our out-of-town friends and family some of the landmarks that they probably didn't read about in their guidebooks.

Choosing the landmarks was a fun process. We polled our friends for interesting landmarks we may not have heard of. We did research on the internet. Because art and creativity are so important to us, many of the landmarks we chose were art pieces (Defenestration, the Wave Organ, Clarion Alley). Many of them were an important part of San Francisco history, even though they might be something you would otherwise walk right by without even noticing (the Golden Fire Hydrant, Lotta's Fountain, City Lights Bookstore). Some were fun and weird (Seward Street Slides). A few were so iconic and important to Ed and I that we couldn't resist including them, even though everyone in the world has heard of them (the Golden Gate Bridge, the Bay Bridge, Coit Tower).

This project was Ed's brainchild, but I had a vision of how to implement it. Each table number would be a piece of purple cardstock with a photo of the landmark on it, and the title written in silver ink. On the back would be a description of the landmark, printed on silver paper and pasted to the purple paper. We decided to make the table numbers folded tents rather than single sheets held up by table number holders: one less thing to spend money on (table number holders), one less thing to get rid of after the wedding.

Because Ed was heading up this project, he did most of the hard work. He compiled the initial list of landmarks. He trolled Flickr for high-resolution Creative Commons photos of said landmarks, getting permission where the photographer's license required it. He ordered professional prints of the photos. He researched and wrote up the descriptions. All I did was pick out the paper, print the descriptions, and put the table numbers together. It ended up being a great project for us to work on together because we both got to flex our creative muscles but we didn't step on each others' toes too much.

The other thing that was great about this project is that it was cheap! Even with the nice cardstock we used, the entire project came out under $40. Here's how we did it.

Supplies needed:

  • 19 sheets of 8.5" x 11" purple cardstock (Stardream Metallics, about $0.90 each from Flax Art and Design - we got a few extra sheets for goof-ups)

  • 10 sheets of 8.5" x 11" silver paper (Stardream Metallics, about $0.60 each from Flax Art and Design - we got a few extra sheets for goof-ups)

  • 16 4" x 6" photo prints (about $0.19 each from AdoramaPix.com)

  • Silver paint pen (about $4 from Flax Art and Design)

  • Double-sided tape (about $3 from Flax Art and Design)

  • Bone folder ($6 from Flax Art and Design)

  • Printer to print descriptions on silver paper, or get them professionally printed by a copy shop (about $0.06 per page, 6 pages total)


Total: $39.50

Directions:

  • Decide on a theme for your tables. Pick out individual items--landmarks in our case--within that theme to represent each table.

  • Research and write up descriptions for each landmark.

  • Find Creative Commons licensed photos of each landmark. Be sure to respect each photographer's license!

  • Download a high-resolution version of each photo and send them to a photo printing shop such as AdoramaPix.com. Note that it may take a week or two to get your prints back so be sure to plan in advance. Many local shops can also print your photos for you, and they might be faster than ordering them online.

  • Buy paper and other supplies.

  • Print descriptions on silver paper and cut them out. Be sure to include photo credits in your descriptions!

  • Score and fold each sheet of cardstock in half using the bone folder. (Tutorial here)

  • Using double-sided tape, tape each photograph to one side of your cardstock tents.

  • Using the paint pen, write the name of that landmark next to the photo.

  • On the other side of the cardstock, affix the description of that landmark using double-sided tape.

  • You're done! It's that easy.


Table designations for our wedding

Table designations for our wedding

Table designations for our wedding


If you're curious, here is a list of the landmarks we used, along with Ed's descriptions:

  • Golden Gate Bridge

    The Golden Gate Bridge is one of the most photographed bridges in the world, but you probably already knew that. It opened on May 27, 1937 after only 4 years of construction and coming in $1.3 million under budget ($35 million). If only we could build bridges that fast and that cheap today. It's "golden" color is actually "international orange" and is a color used for safety reasons due to it's high visibility.


  • Bay Bridge

    Even Emperor Norton was in favor of a bridge connecting San Francisco with the East Bay. However it wasn't until 40 years after his call for a bridge that the engineering task was completed. The Bay Bridge opened for traffic on November 12th, 1936, just 3 years after construction began. Additional construction on the bridge will probably take 30 years. The bridge originally carried both trains and automobiles across the Bay, and in William Gibson's vision of the future it will serve as a home to a number of people.


  • Sutro Baths

    The Sutro Baths opened March 14, 1896 as a public bathhouse envisioned and developed by former mayor, Adolph Sutro. During its hey-day, there were 7 different swimming pools (1 fresh water, 6 salt water), a museum, a concert hall, and even an ice skating rink at one point. Utilizing the high tide of the Pacific Ocean it was capable of recycling 2 million gallons of water in about an hour. Nowadays the ruins serve as a great place for photo shoots and a romantic place to watch the sun set.


  • Fort Point

    Hidden underneath the Golden Gate Bridge you'll find an old fort built back before the Civil War. Fort Point, once called "the key to the whole Pacific Coast", was built to protect the Bay against hostile warships. Luckily it never had to fire a single shot in defense. Fort Point was almost demolished when the Golden Gate Bridge was built, but the chief engineer, Joseph Strauss, decided to build over it. Fort Point is made of hallways and arches and there are cannons.


  • Treasure Island

    Treasure Island is a completely man-made island off of Yerba Buena Island. It was created in 1936 and 1937 with fill dredged from the Bay for the Golden Gate International Expo of 1939. It is just shy of 1 square mile and has a population of about 1,500. It is indeed named after the novel by Robert Louis Stevenson, who was briefly a San Francisco resident. It is currently owned by the U.S. Navy but is considered part of San Francisco. Over the years it has been used for several movies, tv shows, and has an annual music festival aptly named the "Treasure Island Music Festival" (you just missed it, it was last weekend). It also has one of the best views of downtown San Francisco and is a great place for graffiti.


  • Lotta's Fountain

    If you were around San Francisco after the 1906 earthquake you'd be very familiar with Lotta's Fountain. Being one of the few remaining structures left standing on Market Street, it turned into a central meeting place to share news and information. The fountain was originally donated in 1875 by singer/dancer/entertainer Lotta Crabtree - a character in her own right. Her fountain is the oldest surviving monument in San Francisco and was actually restored in 1999. Most people don't even notice the fountain on their daily commute, but next time you pass by the Market/Geary/Kearny intersection keep an eye out or it.


  • Coit Tower

    Standing 210 feet in the air, Coit Tower was built in 1933 at the bequest of Lillie Hitchcock Coit. It is a monument to the firefighters of San Francisco. Lillie, a patron saint of sorts for the SF Fire Department, loved helping them, fighting fires, and riding the Knickerbocker Engine Co. No. 5. She was also known for smoking cigars, wearing pants, and even sneaking into men-only establishments to gamble. Inside the tower you'll find several murals, many of which were made possible by New Deal federal employment programs for artists.


  • Wave Organ

    Maybe you've been to the Wave Organ after an sf0 event, or perhaps you saw it in a Corpus Callosum music video, but have you actually stopped and listened to it? The Wave Organ uses a series of tubes to interact with the waves of the Bay, creating all sorts of sounds as the water rolls in. The stone platforms and benches are partially made with pieces salvaged from the Laurel Hill Cemetery in San Francisco. It's a bit of a walk out onto the peninsula jutting out of the Golden Gate Yacht Club, but this unique acoustic sculpture awaits you at the end.


  • Golden Fire Hydrant

    Across from Dolores Park sits a golden fire hydrant that saved Noe Valley and the Mission during the fires following the 1906 earthquake. As other hydrants ran dry, this one continued to pump water, helping fire fighters and residents save their homes. Over 3000 civilians spent 7 hours battling the flames, even stopping to pull the fire department's steam engines up Dolores St when the horses couldn't. Every year on April 18th the hydrant gets a fresh coat of gold paint in a special ceremony.

    For a lengthy, dramatic retelling of this event, please take a look at this website.


  • Bison Paddock

    There's bison in San Francisco. They're in Golden Gate Park. They're actually kind of boring other than the fact that there are freaking bison in San Francisco. It's also one of Heather's favorite landmarks.


  • Sutro Tower

    Standing 977 feet on top of Mt Sutro is what many of the locals consider the defining landmark of San Francisco. The Sutro Tower was built in the early 70s, with it's first transmission on July 4th, 1973. The land it is built on was once the grounds of the Sutro Mansion. The tower, owned by Sutro Tower, Inc, transmits the signals of 11 televisions stations, 4 FM radio stations and about 20 wireless communications services. It is the tallest structure in the city, beating the Transamerica Pyramid by more than 100 feet. And no, you won't get fried if you climb the tower while the transmitters are on.


  • Defenestration

    Defenestration (n. the act of throwing someone or something out of a window) is a site-specific art installation at the corner of 6th and Howard Streets. It consists of several pieces of furniture (couches, lamps, tables, etc) attached to the side of the building. Originally designed by the artist Brian Goggin, it was intended to be installed for only a year, but thirteen years later it is still mostly intact and is currently in the process of being restored. It's one of the first projects that Ed randomly came across that cemented his love for San Francisco and the community that exists here.


  • Baker Beach

    What many would call the birthplace of Burning Man, Baker Beach is a clothing-optional beach (seriously, do a google search) situated on the northwest corner of San Francisco, just south of the Golden Gate Bridge. With great views of the Golden Gate Bridge and the Marin Headlands, it's worth the hike down the step incline. Baker Beach is also the location of Battery Chamberlain, which was equipped with 6 inch guns capable of disappearing. You can see one of these 97,000 pound guns, donated in 1977, on display there. Most recently it has been the site of Balsa Man.


  • Seward Street Slides

    Grab a piece of cardboard and head over to Seward Mini Park (at Seward St and Douglass St in the Castro) for some hardcore sliding. A pair of concrete slides are one of the hidden gems of San Francisco. Loved by adults and children alike since their construction in 1973, the Seward Street Slides are the next step up for everyone tired of the ultra-safe slides in playgrounds today.


  • City Lights Bookstore

    City Lights is an independent book store located at Columbus and Broadway that was founded by poet Lawrence Ferlinghetti in 1953. In addition to being a staple of the Beat generation, it was best known for publishing Allen Ginsburg controversial "Howl" in 1956 which resulted in a trial for distributing "obscene" material. The acquittal of City Lights would set the groundwork for several other controversial publications to come. In the early years the store was dedicated to selling banned books and other paperbacks. Today it still retains this feel, mixing new releases from big name publishers with harder-to-find specialty releases.


  • Clarion Alley

    Clarion Alley can be found between Mission and Valencia, running parallel to 17th and 18th streets. Unlike many of the alleys in the Mission you'll find more than just trash here. Thanks to the Clarion Alley Mural Project, an artists' collective formed in 1992, the alley is covered in large murals from various artists. Constantly in flux, the art work of the alley morphs and changes over time as new artists contribute pieces that range from political statements to seemingly 3D illusions of escalators.

Wednesday, November 10, 2010

DIY: The Lingering that No One Warns About

It's our one month anniversary today and well... remnants of DIY projects still linger. Remember this somewhat organized sprawl?

Well... Didn't stay like that. The table with the paper on it had boxes stacked up on top of it. The front hall had gear from Burning Man, linens, and more.

And now... A month after we said "I Do." From where I sit I can still see my Cricut Personal Electronic Cutter. I still don't know how to use the thing - didn't have time after the couple of sessions where I sat down with it and tried to craft table numbers and shapes for our guestbook.


I've got printers scattered about - my original trusty HP for which I couldn't find the powercord when we needed to print invitations. My doll size Canon Selphy which powered through Save the Dates, RSVP cards, and 4x6 photographs. Our new HP which dutifully - sometimes with coaxing and a whole lot of swearing - gifted us with invitations, programs, and more.

So what was your trick? Bowie Bride decorated their apartment with their DIY projects. But what do you do with all the tools? The supplies?

I want to know because I want an apartment that doesn't scream wedding.

Friday, October 22, 2010

What We Did: Bouquets

For our flowers we wanted in-season, local blooms at a reasonable price. We'd waited until the week before the wedding before researching badge options for the San FranciscoWholesale Flower Mart. When we called we found out that you can apply online but processing takes two weeks and you can only pick up your badge on specific days at specific times.

What did this mean for us? We could still go to the Flower Mart but only during hours when they're open to the public. Not all vendors sell to the public and not all are open on Saturday. For hydrangeas and baby's breath this wouldn't be a problem. For more exotic and more specific blooms this might be a problem.


We took a first pass through the mart and then picked through the buckets of hydrangeas for the freshest blooms. There were a lot that were already browning but we were able to find enough fresh antique blooms. We got the hydrangeas from two vendors, one of which was Piazza International. The total cost of the flowers for our cake and my bouquet came to $33.14.

Earlier in the week we'd decided to replace regular baby's breath with a purple "baby's breath" or statice. After looking at the available flowers we picked the purple "baby's breath" and paired it with dark pink wax flower and silvery leaves. The flowers for the bridesmaids' bouquets and the boys' boutonnières came from Neve Roses and cost $39.96.

We'd budgeted $100 for florals and this was one DIY area where we came in under budget at $72.10.

After we picked up our flowers we were off to our Diva of Honor's house to assemble the bouquets. It was such a nice sunny day that she brought her dining room table out into her backyard so that we could enjoy the day while we worked.


I'd originally thought we'd secure blooms with rubberbands. Instead we used zip ties.


After Ames assembled the bridesmaids' bouquets she tied the ribbons for my bouquet and the toss bouquet.

Once the bouquets were finished, we transferred them to our refrigerator.

In case you missed it, all of our bouquets - with the exception of the toss bouquet - had three antique keys on them.

Wednesday, October 20, 2010

DIY: Day of Survival Kits

I've watched too many episodes of The Rachel Zoe Project and been the photographer at too many events where the guest of honor has had some wardrobe mishap or other emergency. For either or maybe both of those reasons, it was important for me to give each participant their own Day of Survival Kit.

The essential ingredients:
Did you get a Day of Survival kit when you were in a wedding? Did you give your wedding party a kit? What was the item you found most helpful?

Remember that if you're trying to save money, buy in bulk and/or order in advance for free shipping. We acquired the pieces for our kits over a couple of sales and with a few coupons. The neat thing about these kits is that they're perfectly sized to drop into a big purse or tuck into your glove box. They don't have to be used just for the day of the wedding.


Saturday, October 16, 2010

DIY: Our Ketubah

When it comes to the design of your ketubah, there's basically no limit to your options. If you're an Interfaith couple, you have some restrictions as to the language and whether or not witnesses are required to sign their Hebrew name(s).

We found a DIY Ketubah kit from Tsilli Press online. Tsilli provides two texts. We used the first line from her first text to preface the second text she provided. 

We chose one of the photos a friend took of us during our Burning Man ceremony for the design element.

As I cannot yet read Hebrew, we needed to keep the line breaks the same as provided by Tsilli. Complicating this was the fact I did not have Hebrew characters on my laptop. By taking a screen shot of the Hebrew and importing into Adobe Photoshop we were able to lay the text out around the photograph we chose for our background.

Credits: Text - Tsilli Pines Art and Design LLC's DIY Ketubah Kit; Design - Eden Hensley; Photography - Tom Cavnar via Flickr

So what do you think?

ProTip: Don't leave printing out your ketubah until the last minute. While we did get our ketubah printed in time (one hour processing at Wolf Camera and Video on Market Street) it took a couple of attempts. First the autoloader software couldn't read the files on our disc. Next armed with the Transformer Flash/USB Card the software still couldn't read the files. The third time however was the charm.

Monday, October 11, 2010

DIY: Gifts for the Parents

Everyone talks about keepsakes from your planning. You'll want a binder to keep swatches, receipts(?), and more. Um ok.

I started with the idea of a leather-bound, expandable post-bound, scrapbook. I began filling it with 4'x6' cards (in case you weren't aware a lot of the images and collages on the blog are 4'x6' - easy to print on our Canon Selphy). And less than two months into the real planning (two months after we actually set a date), I abandoned that idea. Why? There's just too much to keep track of or organize while you're in the midst of planning.

You're probably wondering why I bring up my scrapbook in a post about gifts for Our Moms. Well I had this idea that we'd give them an electronic version of that scrapbook for their gifts. Our Moms have almost everything under the sun. Our Moms would appreciate a sentimental gift. And here's the dilemma. We have a lot of content. Not everyone cares about all the planning minutia. So how do we keep this tome from being a sleep aid?

The thought is that our manuscript tells how we met and fell in love and then chronicles the crazy seven to eight months of planning. The programs pick up from there - a quick recap of Our Story So Far through to the details of our 10/10/10 ceremony and reception. Cover design will be similar to our programs. Typography and design elements will be consistent with the programs as well. 

We know we're going to use Blurb to produce the keepsake - it'll be a combination of photography and text. Our manuscript will be laid out in Adobe InDesign and then printed to PDF for proofing and finally uploading to Blurb. That's the easy part.

The challenging part? How do you structure the story? The manuscript needs a beginning, a middle, and an ending. It needs suspense, drama, and comedy. It needs to be personable and reflect "us." How do we balance the manuscript? I tend towards cheesy and sappy. cubes tends towards matter-of-fact wit with a smattering of sarcasm. 

If you were writing the story of how you met, fell in love, and planned - and survived - a wedding, how would you organize the story? Chronological - start to finish as it happened? Topical? A She Said, He Said? Or would you just take your blog as is and create a book?

Here's what I'm thinking so far for organization:
  • Colophon
  • Preface
  • Acknowledgements
  • Body
  • Special Insert: The Fireflies Say "I Do"
  • Conclusion: Just Married
As you can see, I'm struggling with what to do with the body of the book. (In case you're wondering not all of the blog will be published. We're starting with the posts labeled "us" and whittling down from there.)

Send me your suggestions, please! Now that we're happily married I'd like to get the first part of our story tied up with a pretty little bow.

Monday, September 27, 2010

Update: Guestbook

This weekend I took a brief break from the table number and program projects. What did I do? Mixed media and scrapbooking.

Specifically I embellished our guestbook. I'd hinted that I'd planned on customizing it when we decided to use a journal from CreARTing Handmade. Here's what it looks like now.

Personal Photos

At the reception guests will have the opportunity to add their favorite recipes, recommend restaurants and dishes, recount meals shared with us, and suggest the next meal they'd like to share with us. 

The guestbook station will be set up initially in a bay window with stickers, paper scraps, markers, and glue sticks. After the cocktail hour ends the station will move to near the bar so that guests have time throughout the evening to add their tips.

This is one DIY project that could have been overwhelming had we (I) decided to make the journal from scratch. Instead by starting with a handmade journal, this has become one of my favorite projects. I can't wait to see what our guests contribute.

To our guests: Be sure to check out the sample page layouts in the guestbook. (Hint they tie to Our Story and our table numbers and may have some of the answers to the puzzle found in our program.)

Wednesday, September 22, 2010

DIY Update: Step away

At a certain point, regardless of if the DIY project is special to you or not, you need to step away. Your vision isn't going to happen no matter how much you try to force fit it. And most importantly, most of your guests aren't going to notice the absence.

So what DIY project did we walk away from? A lot actually. One was postponed until after the wedding for a more personalized thank you. 

The latest? The hardest one to let go of? Our collection of wine and beer bottles. You remember the ones that were going to be filled with eco-friendly dripless tapers down the center of our U-shaped table? The ones when open flames were banned that were going to be filled with sprays of baby's breath?

Now, yes, tables lined with sprays of baby's breath would have been gorgeous. But that wasn't the original vision and it was a vision I kept forgetting. I kept imagining and wanting candlelight. Okay, not just imagining, obsessing. 

Obsessing to the point that I was considering getting a bottle cutter and creating my own votive holders. Heck after a quick search I saw lots of tutorials. Mrs. D'Orsay's write up makes it look simple - just time consuming. A thread on the Craftster Community Forums quickly convinced me this *might* not be the best project to tackle when facing a time crunch. 

Wine Bottles: Cut and Assembled :  wedding decor diy ithaca 12 1
Miss Locket via Weddingbee

Knowing how stubborn I am - determined - I did the only thing I could. We took all of the beer and wine bottles we collected and tossed them into the recycling bin.

As cubes reminds me each time we come across one more misunderstanding or scheduling conflict, focus on what's important. He's right. At the end of the day, I'm not marrying a bunch of wine and beer bottles and we had fun with our friends over the past year collecting them. And heck, friends are one of my top three.

The other benefits of axing the bottles? We don't have to find a bunch of baby's breath before the wedding. We don't have to mockup another tablescape. We don't have to thread ribbons through keys and tie them around the bottles. We don't have group bottles into neat bags by table. And best of all? No one has to haul them up 22 steps.  

Thursday, September 16, 2010

DIY Update: A Commercial Option for Our Envisioned Throw Pillows

We - rather I had - these grand plans of softening our venue. Irresistible super plush in our neutral wedding colors - black, charcoal, and ivory - was sourced. Orphaned flowers from initial tablescape plans were united with a new DIY project. 

Then... Syzygryd happened. So no DIY throw pillows. (Stop laughing now. Would you want your grandmother sitting on a cold hard bench? Yeah I thought not.)

Seems that no idea is truly unique. Just in time for Fall, throw pillows with flowers. 
Double Flower Wine 18" Decorative Toss Pillow
18" Throw Pillow 
$24.99 at Bed, Bath and Beyond

Quite elegant. Almost our wedding colors even!

Don't worry you're not going to find this accent at our wedding. Why? It's not us. The Dahlia covered pillows and plush do tell a story. A day I sent my parents on a scavenger hunt for silk flowers in our wedding colors. A day my mom and I took our scavenger hunt to the State Capitol. An evening when cubes and I prepared the flowers. An afternoon when cubes and I scoured Michael's for non-sew pillow closure (think fusible velcro in place of zippers) options.

While on the subject of decorative pillows I came across two other more budget friendly options in two of our wedding colors - Ivory and Black - from Brentwood Originals. I think they'd look better in a more modern setting than in our early 19th venue - a seating group similar to one we saw at Promises and Pearls. How inviting would that high-backed settee be with a couple of Rosette pillows?
Related Posts Plugin for WordPress, Blogger...